The Ultimate OS X Snow Leopard Stack For Rails Development - x86_64, MacPorts, Ruby 1.8/1.9, SQL Server, SQLite3, MySQL & More
This guide is all encompassing but primarily focuses on the benefits of MacPorts, second the development stack for SQL Server and lastly on anything else a rails developer might need on OS X. If you are on a Mac, possibly running Snow Leopard and x86_64 is near and dear to your heart, this article is for you. If you do not "have" to use SQL Server, you can safely skip those sections and get to the Ruby1.9/Apache2/SQLite3/MySQL stuff.
A small forward. If you are developing rails applications on a modern OS such as Snow Leopard and your needs never make it out of the shallow end of the default Ruby and SQLite3, then this how-to might not be for you. However if you find yourself needing more and you want it to be easy and optimized for your architecture, then I highly suggest MacPorts.
Even though this tutorial is based on MacPorts, there are alternatives if you have the guts. One is called Homebrew by Max Howell, which offers a very easy package management system that is closely knit to OS X's own libraries. If your smart enough to manage the sheer amount of dependencies and different ways OS X wants to pull you when using their libraries, then have at it. I failed horribly and I consider myself somewhat smart. This article also focuses on running multiple versions of ruby, specifically 1.8.7 and a flavor of 1.9.x. Again to this end there are other solutions. One recent one is called Ruby Version Manager (rvm) by Wayne Seguin. An incredible library, but something I could not use with my level of compiling source due to the fact that all the dependencies needed for SQL Server to ODBC are hard enough to get in place for one ruby installation. RVM has it's use, but if you just need two versions of ruby with a full 64-bit stack to SQL Server, read on.
Install MacPorts
If you have not done so already, go download MacPorts and run the installer and follow their installation instructions. At the time of this writing, the current version is 1.8 and has tons of new stuff for Snow Leopard. If you use bash, the default shell on OS X, then add this to your ~/.profile.
export PATH="/usr/local/bin:$PATH"
export MANPATH="/usr/local/share/man:$MANPATH"
export INFOPATH="/usr/local/share/info:$INFOPATH"
However, if you have changed your default shell to ZSH, then put this in your ~/.zshenv file. I highly recommend switching your default shell to ZSH.
path=(/opt/local/bin /opt/local/sbin /opt/local/apache2/bin $path)
manpath=(/opt/local/share/man $manpath)
infopath=(/opt/local/share/info $infopath)
Important x86_64 Arch Notice
If you are running Snow Leopard and if your processor supports 64-bit, say a Core 2 Duo (consult your manual), then I highly suggest you set the MacPorts build_arch to force it to x86_64 for all installed ports. Remember, even if you have a unibody MacBook that can not boot the 64-bit kernel yet, that does not mean you are not running 64-bit apps. If your chip supports it and your on Snow Leopard, turn it on. Here is how.
Open up your MacPorts config file located at /opt/local/etc/macports/macports.conf. Around line 59, find the section that has the build_arch and set it to x86_64. I have done this on both my unibody MacBook 13" and Nehalem MacPro and everything has installed and works perfectly. This includes, ruby, git, and everything in between. See screenshots below for proof. Lastly, as a good habit, always run sudo port selfupdate before installing ports. This makes sure you have the latest port files.
Installing Ruby 1.8.7
By now Ruby 1.8.7 is the new 1.8.6. It will be the de-facto low level version that supports the enterprise. Frankly, 1.9.2 is really where it is at, but we all have our day jobs right. Either way it is good to have this version installed. You may ask why, 1.8.7 comes on OS X by default now in Snow Leopard? Correct, but the goal here is to get a base ruby installed whose libs are known and compiled the way we want them for our low level SQL Server libraries and their dependencies. The goal here is to avoid dependency hell.
$ sudo port install ruby

$ which ruby
/opt/local/bin/ruby

$ ruby -v
ruby 1.8.7 (2009-06-12 patchlevel 174) [i686-darwin10]
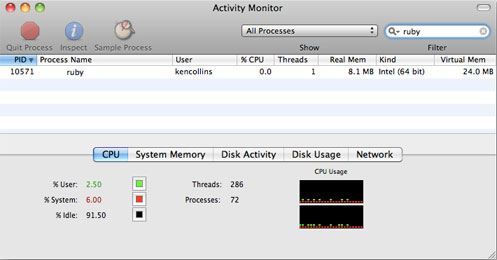
Running that port install may have taken awhile, but let me show you something. Do you see that below? That's right, it's 64-bit ruby just like the default OS X installed 1.8.7. In fact, it's even a bit faster for some reason. So remember, using MacPorts this way means that everything you install that supports it, will be built for 64-bit.
Lets get RubyGems package management up and running. Thanks again to MacPorts this is really easy. Some advice. Never use MacPorts to update RubyGems! We just used it to get it installed easily and quickly and in the right scope. If you need to update RubyGems, just use it's own self update feature.
$ sudo port install rb-rubygems
Feeling good? Maybe like me, you wouldn't mind getting side tracked. If so, go ahead and install Subversion and/or Git. I personally like to install both of these since I use Git to manage my Subversion repos too.
$ sudo port install subversion
$ sudo port install git-core +svn
The SQL Server Connection Stack
So back on track. The low level connection stack for SQL Server is pretty easy. We need unixODBC and not OS X's installed iODBC. After that FreeTDS needs to be installed with the +odbc variant so that it prefers the installed unixODBC. If you did not get side tracked above, these two installs could pull in a lot of dependency installs too and take some time. When we are done the final stack for connecting Rails to SQL Server will look something like this. Ruby/Rails => ActiveRecord SQL Server Adapter => DBI Gem w/DBD-ODBC => Ruby ODBC => unixODBC => FreeTDS => SQL Server.
$ sudo port install unixODBC
$ sudo port install freetds +odbc
If all went well, you should see a configuration file notice after FreeTDS installs. This is just the port reminding us that we will ultimately have to configure FreeTDS to point to our SQL Server box. We'll get back to that later, for now, let's check that the install is looking good.
``` $ which tsql /opt/local/bin/tsql $ tsql -C Compile-time settings (established with the "configure" script) Version: freetds v0.82 freetds.conf directory: /opt/local/etc/freetds MS db-lib source compatibility: no Sybase binary compatibility: no Thread safety: yes iconv library: yes TDS version: 5.0 iODBC: no unixodbc: yes $ tsql I locale is "en_US.utf-8" locale charset is "utf-8" ```
See that last line after tsql -C? It says unixodbc is a go! That's important. If for some reason you do not see this, then I suggest reinstalling unixODBC and FreeTDS in that order again. Also note the output of tsql I and check out the locale settings. On Mac OS X, this seems to default to the utf-8 stuff we would expect. Possibly due to the default LANG env var is set to en_US.utf-8. However, on other systems this may note be right. See the configure FreeTDS section below for what to do if this is the case.
Right. That completes the UNIX'y low level parts to get us talking to SQL Server, now to put the focus back on Ruby again by installing a few gems that will be needed. Here are the ones critical to this setup. Please consult the adapter's README for update to date version information on the approved/latest gems for DBI.
$ sudo gem install dbi -v 0.4.1
$ sudo gem install dbd-odbc -v 0.2.4
$ sudo gem install activerecord-sqlserver-adapter
Almost there, we need one more piece, the Ruby ODBC bindings, so we can talk to the low level unixODBC. At the time of this writing, the MacPort portfile for rb-odbc was stuck at 0.9995 while the ruby odbc project page reports that the latest version is 0.9997. So here is a little lesson on how to edit a portfile to get our desired results.
$ port file rb-odbc
/opt/local/var/macports/sources/rsync.macports.org/release/ports/ruby/rb-odbc/Portfile

$ port file rb-odbc | xargs mate
The first command simply shows you how you can get MacPorts to revel where the port file is located. The second shows how you can pipe that result to xargs to get TextMate to open the portfile. Now that we have the port file in front of us, let's edit it so that it pulls the latest. First change all occurrences of the version to latest, in this case from 0.9995 to 0.9997. Lastly, download your target version from the ruby odbc project page and do a MD5 checksum on it. In my case, when I downloaded 0.9997, the md5 checksum is 36d21519795c3edc8bc63b1ec6682b99. Now change the odd md5 in the portfile to this new one, hit save, and close. Let's try it out.
$ sudo port install rb-odbc +utf8
So without little fuss, that should have worked. Did you notice how we have the +utf8 variant there? If your like me and have national/unicode columns in your database, this is a good thing. The adapter has tests and support for unicode as well.
Configure The SQL Server Stack
First, let's configure FreeTDS to point to our server. Assuming you have TextMate a simple mate /opt/local/etc/freetds/freetds.conf should get it open for us. FreeTDS even put in a few examples at the bottom of the file, I typically comment these out and add my own. In this example I am naming my server "my_dev_server". Note that tds version section, I personally use tds version 8.0 and have tested this against my stack on all SQL Server types with the ActiveRecord tests. Some have reported that they have errors unless the use 7.0. Your mileage may vary. Save and close the file. UPDATE: As noted above when running tsql I, if you do not see a utf-8 locale setting, you may have to add this line client charset = UTF-8 to your configuration file. Here is a thread on how to set tsql's client character set.
# A typical Sybase server
# [egServer50]
#   host = symachine.domain.com
#   port = 5000
#   tds version = 5.0

# A typical Microsoft server
# [egServer70]
#   host = ntmachine.domain.com
#   port = 1433
#   tds version = 7.0

[my_dev_server]
  host = 192.168.1.58
  port = 1433
  tds version = 8.0
It has been noted that Windows user may want to include client encodings and character sets that set UTF-8 values. If you are running on Windows, try out this style freetds conf.
[YOURSERVER]
 host             = yourserver.com
 port             = 1433
 tds version      = 7.0
 text size = 64512
 client encoding  = UTF-8
 client charset   = UTF-8
So after you have added your own server here, it is now time to configure unixODBC to use FreeTDS. Let's copy the default distribution files to the correctly named ones that unixODBC will look for.
$ sudo cp /opt/local/etc/odbc.ini.dist /opt/local/etc/odbc.ini
$ sudo cp /opt/local/etc/odbcinst.ini.dist /opt/local/etc/odbcinst.ini
Open up the newly copied /opt/local/etc/odbcinst.ini file. More than likely, this will be the only time you ever edit this file. Add a FreeTDS configuration to it like so. No personal configuration options here, this just links up the MacPort installed unixODBC and FreeTDS.
[FreeTDS]
Decscription = FreeTDS driver for SQLServer
Driver = /opt/local/lib/libtdsodbc.so
Setup = /opt/local/lib/libtdsodbc.so
FileUsage = 1
So the last thing is to create some DSNs in your /opt/local/etc/odbc.ini file. It is very likely that you could edit this file often. Perhaps you do a lot of development and DB server changes. My personal file has over 20 some DSNs here. Here is one example. The name and description of the DSN is up to you. Take note how I made the server name "my_dev_server" line up to that used in the FreeTDS conf file. That is important. Flavor this to your tastes.
[my_dev_server_dsn]
Driver=FreeTDS
Description=My Server Connection
Servername=my_dev_server
Server=my_dev_server
Port=1433
Database=killer_app
Here is an example of what your database.yml will look like. So by now you should be able to connect and work with your database. I have this working on quite a few Macs. If you found any issues, let me know, but a good place to start is running the adapter tests. That is of course if you have the stack setup right.
development:
  adapter: sqlserver
  mode: ODBC
  username: rails
  password: secret
  database: killer_app
  dsn: my_dev_server_dsn
Going The Extra Mile With Ruby 1.9.x
Here is a little trick that I put in an article called MultiRuby The MacPorts Way. Testing Your Rails Apps With Ruby 1.9. Follow the steps in this post to get 1.9.x installed and switchable between your default 1.8.7 install.
Remember, RubyGems already comes in 1.9 and that tutorial leaves your installed gems under 1.9 empty. Do the right thing and install gems on an as needed basis under 1.9. As for the ruby-odbc which is installed in the 1.8's vendor ruby directory, we will need to trick MacPorts to recompile and reinstall that for us. Here is how I did it. First make sure you in the right ruby version.
$ ruby -v
ruby 1.9.1p243 (2009-07-16 revision 24175) [i386-darwin10]
Now we need to trick MacPorts to forget about the previous install so it will build and use the extconf.rb of the ruby 1.9 installation. Here are the commands to softly remove rb-odbc from MacPorts memory. If you want, you can change rm -rf to just mv and move these files to some other place.
sudo rm -rf /opt/local/var/macports/receipts/rb-odbc
sudo rm -rf /opt/local/var/macports/software/rb-odbc
sudo rm -rf /opt/local/share/doc/rb-odbc
Now you can tell MacPorts to reinstall ruby-odbc and it should create a new odbc.bundle in your /opt/local/lib/ruby1.9/site_ruby/1.9.1/i386-darwin10/odbc.bundle.
$ sudo port install rb-odbc +utf8
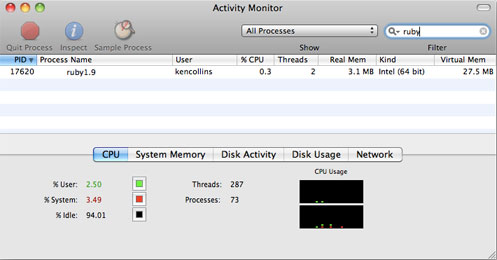
Here is the proof that I have 1.9 installed, working with SQL Server adapter and 64-bit. Thanks to the chruby ZSH function described in my other post, I can easily switch between my ruby installs.
Complete The Marathon!
Installing apache2 and passenger, yes all 64-bit happy.
$ sudo port install apache2
$ sudo gem install passenger
$ sudo passenger-install-apache2-module
How about a more common setup for SQLite3? If you took the side track and installed subversion from above, then you already have SQLite3 installed via MacPorts. If not, that's easy to fix. Here is how to install it and the ruby sqlite3 gem. I have done this for both my 1.8.7 and 1.9.x install above and again I am all 64-bit happy and passing all my tets.
$ sudo port install sqlite3
$ sudo gem install sqlite3-ruby
Installing MySQL and the ruby drivers are a bit more involved. This will get it installed and your launch control setup to act as if your box is a server, ie. load MySQL when it starts up.
$ sudo port install mysql5-server
$ sudo launchctl load -w /Library/LaunchDaemons/org.macports.mysql5.plist
$ sudo -u _mysql mysql_install_db5
$ sudo /opt/local/share/mysql5/mysql/mysql.server start
 Starting MySQL
 SUCCESS!
$ sudo gem install mysql -- --with-mysql-config=/opt/local/bin/mysql_config5
Nice, fully 64-bit and passing all the ActiveRecord tests for me. Note, sometimes you will have to reset your shell for new path binaries to become usable. It's always a good idea to open a new shell post a port install If you get an unfound mysql_install_db5, try opening a new shell. Pay attention to some of the output from that command too. For instance, if you want to set a root user password. I choose not to do this for a dev DB, but I do like to limit the connections so that only local connections can be used by editing the conf file. To create yourself a my.cnf file, copy one of the templates in /opt/local/share/mysql5/mysql, I choose to copy the large conf like so sudo cp /opt/local/share/mysql5/mysql/my-large.cnf /opt/local/etc/mysql5/my.cnf. Then I edit the conf file and uncomment the link that says "skip-networking". That way no one on the local network can hit my DBs. Lastly, here are some helpful aliases that I use.
alias my_stop="sudo launchctl stop org.macports.mysql5"
alias my_start="sudo launchctl start org.macports.mysql5"
alias my_rs="my_stop ; my_start"
alias myconf="mate /opt/local/etc/mysql5/my.cnf"