Mini Network with a Big XServe Style
Or, how to be the biggest network geek you can in only 1 square foot of space. Starting last year after reading Ward Mundy's How-To Bonanza, I knew I needed to use the Mac Mini as the core hardware component for my home network. Mostly because it looks good and small form fits easily on my desk. Good as that might be, the Mac Minis do have drawbacks and, if you're serious about your hosting choices, these do have to be overcome; this is what my post is all about.
So like most people that create networks I did not realize that the Mac Mini includes 3 high speed network interfaces and that with a little bit of work and the right architecture they can be used to operate in much the same manner one would see in a high-end network operations centers. I manage one such NOC and I wanted my home network to function like most companies who do serious business online. These features typically include:
- Internal LAN Network Interfaces - (10.0.1.0/24 Addresses)
- Internal Perimeter Network (DMZ) Behind a NAT or Port Forwarding Firewall
- Both Internal (LAN) and External (Public) DNS Services
- IP Over Firewire Connections - (192.168.1.0/25 Addresses)
- Hard Drive Redundancy and Backup Using RsyncX - (typically RAID 1 or 5)
Starting At The End
Below is a simple diagram of my final network. I had to lose a few features from the list above or even change their meaning a bit, but I did end up with a network that utilizes most of them.
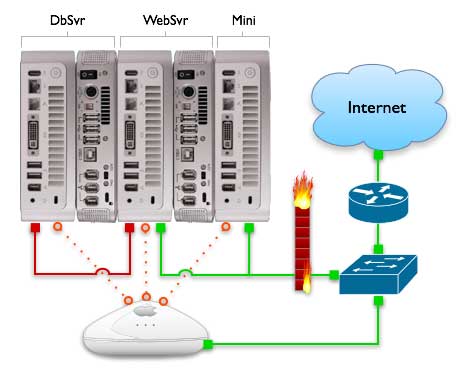
Public Interfaces
In the diagram above, the (green) represents public 100baseT ethernet interfaces while (orange) and (red) represent an internal network. Due to many questions regarding this layout, I want to stress that the WebSvr and generic Mini (mail and DNS) are publicly available on the 100baseT connections through my Linksys switch. The AirPort is for local LAN only, see below for details.
Internal Local Area Network ( LAN )
First thing on the list that is the most important feature. A local area network that allows connections to each server without going outside to the public internet and thus taking up valuable bandwidth to those public interfaces. It's also good for security! The AirPort Extreme I had did this quite well by setting it to share a network connection using DHCP and NAT on the 10.0.1.0/24 subnet. The AirPort internet connection is setup to DHCP to my ISP from its WAN port. Each Mac Mini's AirPort network interface is manually set on its own IP address that never changes. This will need to be done so you can assign it an internal DNS name and reverse PTR record.
Internal DNS Services ( WebSvr Mini )
Now that we have an internal LAN we can use this to host our own DNS so that machines on the local network including my powerbooks and other systems will use the AirPort interfaces for services. For instance, if I browse to my website from home, I am not using the public interface and bandwidth, but rather the IP with the AirPort address. The WebSvr Mini was my best choice for hosting DNS and I have BIND 9 configured to only listen for queries on the local 127.0.0.1 IP and its own 10.0.1.x AirPort IP address. BIND is also configured to forward all unknown queries to my ISP. It's very important to set the basestation's internet tab be set to use the WebSvr Mini's 10.0.1.x AirPort IP address for DNS, rather than your ISP. In this way, all clients that are not manually configured to do so will use the WebSvr mini for DNS and hence the AirPort interfaces on each server for services. I hope I have not lost you yet. When using internal DNS the right way, all local traffic such as Apache, Apple Remote Desktop, MySQL, SSH, etc. are all done locally and fast. So do not forget to tell Apache it can listen on that port.
IP Over Firewire Database Connection ( DbSvr Mini )
The DdSvr Mini is using Apple's IP over firewire capabilities to connect to the WebSvr Mini. I have a patch cable connected to the WebSvr Mini with static IP addresses on both ends using the 192.168.1.0/24 subnet. For convenience each of the 192. addresses ends with the same number as their respective 10. AirPort addresses. This is the 3rd network interface that most people are not aware of. It has limitations but used wisely it can be very useful and fast. In the set up above I am able to keep all database traffic entirely off of my internal switch and localized to that one patch cable. Unless of course, I decide to access the DbSvr Mini using its LAN/AirPort address. Either way, this machine is totally off the public network and quite secure.
Other Services ( Mail and External DNS )
That's what the other unlabeled Mini is for. I have it configured to for mail and public DNS. Postfix is happily listening on its public and private addresses while DNS is only listening on the public IP. This server also does not have an external drive (see below) since I am not worried about its performance since the overhead is quite low for those two services.
Firewall Services
In this setup I did loose the ability to have private addresses for my two public Minis. Hard core network engineers would point out that this would be another layer of security by having a single firewall/router filter and translate packets to these two boxes. I agree and it makes for a nice portable network too. But, I am more than happy running the ipfw service built into OS X Server that is running on each Mac Mini. It is a great stateful firewall and it's not really a configuration nightmare to maintain each one. All in all, it's what I call the RONCO network, set it and forget it. Now on to fixing some of the deficiencies for the Mac Mini.
Improving Hard Drive Performance
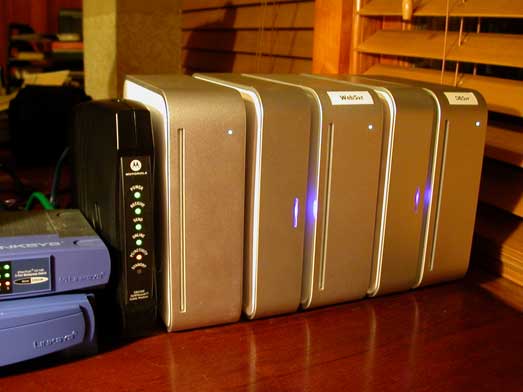
One of the first drawbacks to the mac mini is its poor hard drive speed. This can be a real big hit on performance when it comes to hosting a descent web or database server. Thankfully there are alternatives including upgrading the internal drive with a faster form factory laptop drive. However, these can be expensive and if you are like me and have a few Barracuda 7200 RPM 3.5 inch external drives laying around, you could save a lot by purchasing an inexpensive firewire enclosure. I decided on the miniStack from newertechnology since it had the best cooling features and good Mac Mini style. More importantly it sells with a driveless option and comes with firewire cables. A deal for only $69.00 for the entire kit.
I purchased (2) of these, one for each Mini who's performance I was really concerned about, one for the web server and one for the database server. Each of those Macs boot directly from that external drive connected via firewire, the internal drive is used as a back up. Currently I have the DbSvr Mini setup as an RsyncX server and every night each of the 3 servers backs up to its internal hard drive. That's a separate post in itself.
Improving AirPort Signal Strength
I was really surprised to find out how poor the Mac Mini's AirPort signal strength was after you stack something on top of it. My extreme basestation was only a few feet away and the interference from the drive enclosures was so bad that I could not connect two of them that were in the middle of my stack. Thankfully, I was no stranger to taking apart my Mac Mini. In fact, I had installed AirPort cards on all of them since it was cheaper for me to do so and I had an idea! So be warned, the following steps will void your warranty - but if you want to get good AirPort strength and this was a must for me, here is some helpful instructions.
First though, the unordered list below is a parts list with links to Mac-Pro.com. If you are wanting to install an AirPort Extreme card in a Mac Mini, these are the parts you will need. Secondly, my AirPort signal strength "fix" below is by no means a comprehensive step by step for a first timer into the Mac Mini. I highly recommend PBFixIt.com's Mac Mini Take Apart Guide for that.
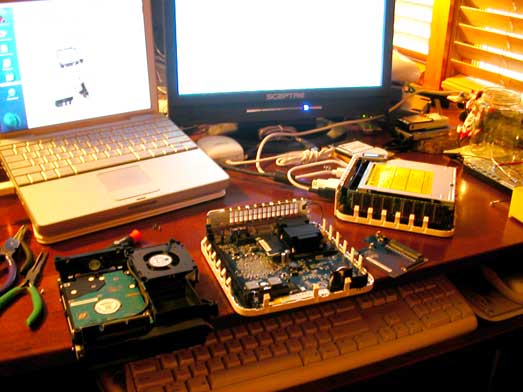
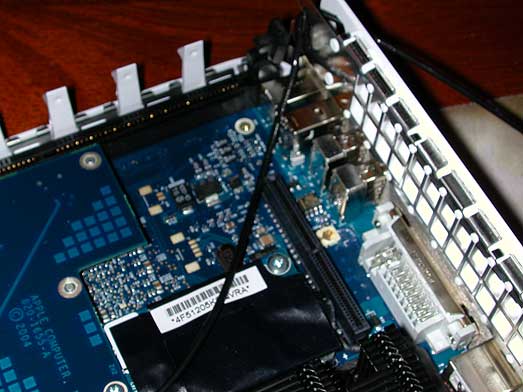
OK, now to the fun part, Improving your AirPort signal strength. You will need to get a good clean work area setup and take apart your Mac Mini down to the mezzanine board where your AirPort card is installed. Do not actually take that out, we are just going to reroute the cable. Just unplug the AirPort extreme antenna.
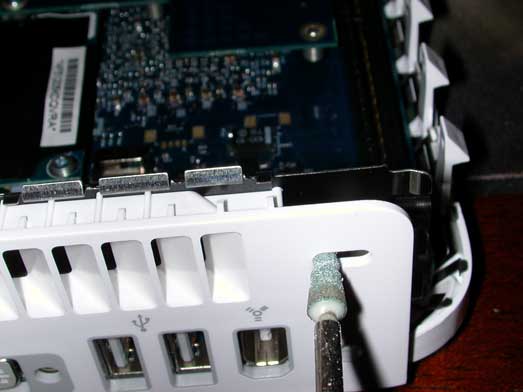
The most logical place to run the AirPort antenna externally is through the security hole on the back right side. The only other choice would have us drilling holes in the vents and the hood that funnels air out the back of the Mac Mini. Least invasive is good, so I took a dremel and widened that hole up. I made a circular opening the same diameter as the existing width of the security hole.
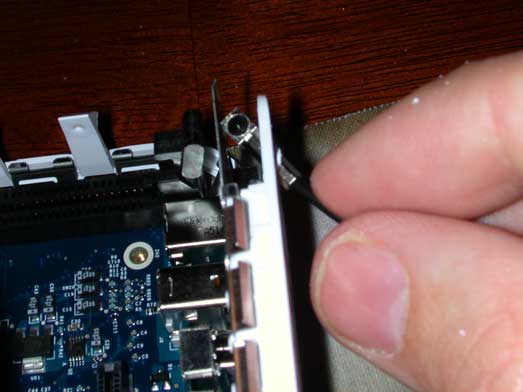
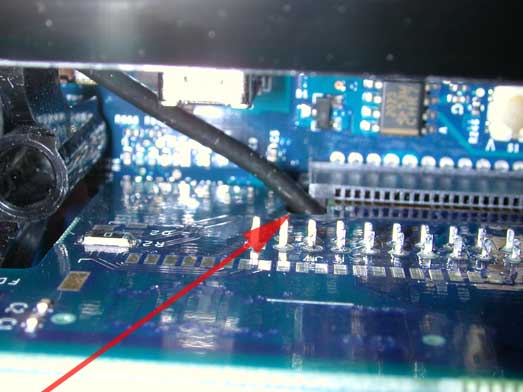
Now that the hole is wide enough, route the AirPort antenna back through this new opening. Make sure not to cut the antenna cord on the metal shielding.
After you connect the AirPort antenna back to the AirPort extreme card, make sure that you leave the cable lying next to the slot the drive and fan assembly goes back into.
Here is a picture of the how the antenna cable routes through the small opening that is designed to the left drive and fan assembly slot. This is where Apple intended the AirPort antenna to go. We are just taking a detour.
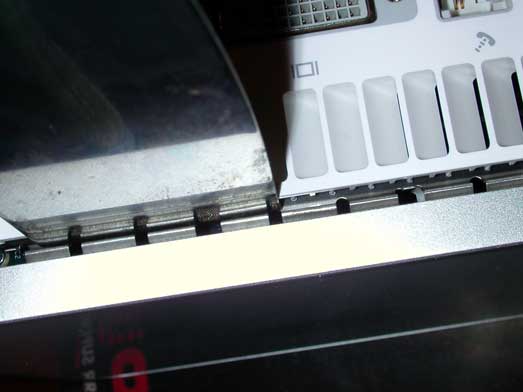
Now we are ready to put the cover back on the Mini, but since we have the AirPort antenna going out the security slot, we will need to cut the metal anchor off. I sliced it right at the bottom, marked in the larger photo.

I have found it extremely useful to take your putty knife and push on the shielding on the back side of the Mini when you are snapping the cover back on. Otherwise you will just bend the clips when you are pushing it together. And just in case your asking, yes, a putty knife is the standard tool for taking apart a Mac Mini.
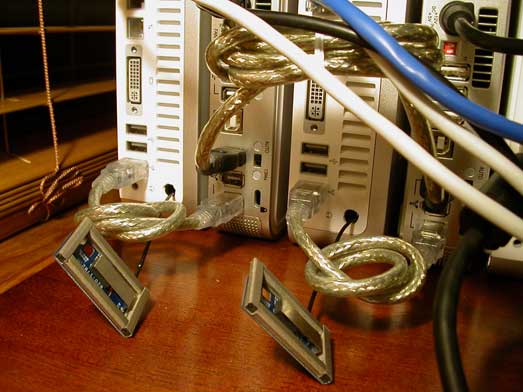
Here is a final picture of the back of the Minis after they are all back together. Here you can see the AirPort antennas sitting comfortably out the back. No signal interference now!
 <
<
This was the reason I started my network project. I have 3 servers right on my home office desk with all the comforts of a full fledged NOC in less than 1 square foot of space.
That's it! If you have any questions, please let me know. Or perhaps, maybe you have some ideas on what I could work on for version two of the network?