My Own Soup to Nuts Recipe for Ruby on Rails on OS X
Tim Toady tells us that (There Is More Than One Way To Do It) and I am sure this is not the first and not likely the last blog post you will ever see that tells you the best way to install RAILS on OS X. Some people would just rather than go the simple path but I implore you, do it this way. Gaining the experience of compiling your own software will help you down the road when it comes time for doing more advanced things, especially deploying your RAILS app. When you are done, you will have a rock solid deployment environment for RAILS that will include:
- Ruby and RAILS
- MySQL Community Edition
- FastCGI & LightPPD
Step 1 - Install Apple Developer Tools
The Apple Developer Tools are needed to install Darwin Ports which opens up the door for a bunch of other goodies we will need.
- Go to Apple's Developer Connection site.
- Click on "Join Now", create an account and log into the site.
- Go to the "Downloads" section.
- In the right box, click on "Developer Tools"
- Scroll to the "Xcode Tools 2.3" section and download the large disk image.
This is obviously going to take awhile, if you want to skip ahead and start on some of the following steps, by all means do so. Once you are done downloading the Xcode Tools and have the disk image mounted, install the package named "XcodeTools.mpkg". You do not have to worry about the others, especially the WebObjects package :)
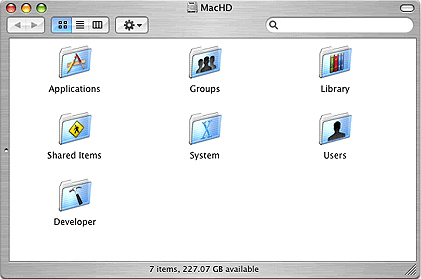 Once you are finished with the install of the Developer Tools, you will have a new folder at the root of your hard drive called "Developer", pictured below on an OS X Server install. For the most part you can largely ignore this new folder.
Step 2 - Install MySQL & Setup Your First DB
The Ruby on Rails framework comes by default with the MySQL adapters for ActiveRecord to talk to MySQL servers. I highly recommend you start development with MySQL, its a good database and if you have not read the recent news regarding MySQL AB and Apple working more closely then I will tell you now that it seems like good time to revisit MySQL as your primary database choice. If you believe the press, MySQL AB seems more committed than ever to deploy its development tools to the Mac platform. Many would say that these are not really needed when you use RoR's database migrations and a nice white board.
I have previously used their Administrator and Query Browser only to find them full of bugs and crashing often. I'm now happy to say that most of these bugs have disappeared and I can now use these applications with the current versions of MySQL Community Edition without much ado. I was very happy to hear that MySQL AB has a new tool in the line up (currently in beta) called Workbench. This is their first Entity Relationship Modeling application that brings in many of the features available for editing tables from their Administrator application with the GUI development of ER diagramming. ER tools have been very sparse on the Mac and I am very happy to see this one coming. Either way, do your self a favor and download those three tools, at the least, we will need the Administrator tool to setup some database accounts on your new MySQL installation. You may also find Query Browser helpful if you find yourself debugging ActiveRecord methods. Here is our install and setup process.
- Go to the MySQL 5 Community Edition download page.
- Scroll down to the section title "Mac OS X downloads" and pick the "Max" package that best matches your system.
- Once downloaded, install the MySQL package, the StartupItem package, and the PreferencesPane. The PreferencePane is just a simple switch to turn MySQL on and off.
- Download and install the MySQL Administrator.
- Download and install the Query Browser. (optional)
That's it, MySQL is installed and ready once you restart your system. If you are still downloading the Xcode Tools, you will have to wait to do the following steps which will secure your MySQL installation.
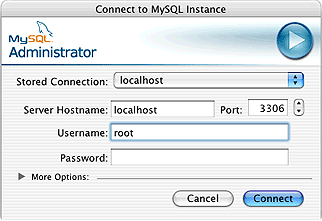 So after a fresh restart from installing MySQL, let's secure your installation by assigning some passwords. To do this launch the MySQL Administrator and log into your MySQL server using the server hostname of
 localhost and the username of root. You do not need a password, it is blank for root@localhost by default, this is what we are going to fix. It is not a big security bug as long as you are the only one on your machine, it is just a good idea to secure this account.
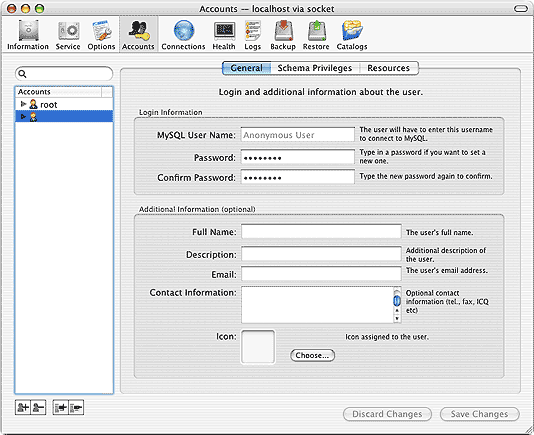
Click on "Accounts" at the top and delete the account that has no name. You optionally may want to set a password for the root at localhost. From this point on you can optionally create an account specific to any databases you may be using for developing. When creating a user, you have to create a host (typically localhost) at the same time by using that + host icon to the right of the new user icon in the bottom right. Click on "Catalogs" to create a database and then come back to "Accounts", expand the arrow beside the user you want to have access to this new database, select the host for that user, click on "Schema Privileges", click on the name of the newly created database schema and then assign the privileges from the available list to the assigned list. Typically I grant all privileges in development environments.
 In the next step, installing DarwinPorts, we are going to cover some $PATH additions that will let our system know where it can find MySQL.
Step 3 - Install DarwinPorts & All Needed Packages
 DarwinPorts is your key to a TON of open source software for your Mac. This can include PHP, Ruby, Apache, and Subversion to smaller utilities like, wget, furl, and pine... the list goes on to over 2,000 ports currently available. It is generally accepted that Mac OS X and Darwin Ports is a good thing, but some disagree. Meanwhile, using DP for all of your open source software can help you keep installed packages in one easy to understand place, by default in the
 /opt directory at the root of your drive. This can save you lots of headaches from the dreaded dependency hell that has plagued most of us whom have not used a good package management system. That is not to say that dependencies will never happen, but when the do, knowing where DP places things can help you resolve them quickly. Let's get to installing our new package management system.
- Download DarwinPorts installer from their site.
- Install the package.
That's about it, DarwinPorts is installed and ready to use. I do however like to clean things up a little bit. If you have followed my previous article Getting on good terms with the OS X shell then you already know how to customize your .bash_profile, so lets fire up TextMate and do just that right now. Although DP does install a .profile file that will customized your $PATH environments, I think it's a good idea that you put this back in your control. If your new to this path stuff, they are basically just a list of directories that lets your computer know where software is installed. Keeping it that simple lets just put these lines anywhere in your .bash_profile.
# My PATH Environment Variables
export PATH="/opt/local/bin:/opt/local/sbin:/usr/local/mysql/bin:$PATH"
export MANPATH="/opt/local/share/man:$MANPATH"
export INFOPATH="/opt/local/share/info:$INFOPATH"
You can see by the example we are simply adding other path options before your systems default, denoted by the $PATH. Using colons is how you separate the list and this is how we have added the MySQL installation into your system's path environment and if you ever need more, make sure to separate them too by colons and typically try to keep your default $PATH at the end. One last note, that /opt/local/sbin is in the code box above so that LightTTPD will be available to RAILS after we get it installed, more info below.
Now let's start using DarwinPorts, if you want to take a small course on the generals about how to use DP, I suggest taking a look at Joe Auty's Getting Started with DarwinPorts, otherwise, just follow along. Remember that building and installing software from scratch is a CPU intensive task for your computer. It is not unusual for an install to take anywhere from 15 to 30 minutes and maybe longer, so be patient.
Fire up a terminal app and use this command, it will bring our fresh DP install up to date. If you had your terminal open before you added your path variables, remember to close it and open a new one so that the changes will take affect. All remaining installs will be issued in the Terminal window.
$sudo port -d selfupdate
Now let's install the latest release of Ruby and its dependencies. This will take awhile!
$ sudo port install ruby
Now install the Ruby Gems package management system.
$ sudo port install rb-rubygems
Now the FastCGI Development Kit and the Ruby interface to FastCGI. These will be needed when deploying your application into a production mode (or development when using ./script/server) using LightTPD also known as Lighty.
$ sudo port install fcgi
$ sudo port install rb-fcgi
Here we will now go ahead and install Lighttpd and its dependencies. The LightTPD executable is located in /opt/local/sbin and this is why we placed it in our path environment. For future reference the default config file for LightTPD is in /opt/local/etc/lighttpd. You may want to make friends with that file when you start thinking about deployment. The RAILS team makes it easy when you use ./script/server by loading in a RAILs specific LightTPD config file, so you do not have to think about this in the default development mode.
$ sudo port install pcre
$ sudo port install lighttpd
Step 4 - Final Installs (RAILs and MySQL Bindings)
 Now to the fun part we have installed Ruby and Ruby Gems using Darwin Ports in our previous step. Now we get to install RAILS with a two part command, the first one liner will install RAILS with all the dependencies using Ruby Gems. The second command, again using Ruby Gems, we will install the latest MySQL bindings. This should speed things up a bit, you can read more about this here along with the performance gains it offers. Please note that when you run this second command, you will likely get a prompt for which platform you would like to install on. I selected option 3 which was mysql 2.7 (ruby).
$ sudo gem install rails --include-dependencies
$ sudo gem install mysql -- --with-mysql-dir=/usr/local/mysql
Just like DarwinPorts, Ruby Gems is a package management system. If you get some time or if you find yourself in a pinch, I find that the command reference here offers a lot of insight and help into how to use Ruby Gems.